N8n
About

This offer provides a preconfigured deployment of n8n on Ubuntu, enabling users to self-host an open-source workflow automation platform within their Azure environment. n8n allows you to design, execute, and manage automated workflows that integrate applications, services, and APIs using a visual, node-based editor.
The solution is intended for developers, IT teams, and organizations that require full control over their automation infrastructure and data. By running n8n on Ubuntu in Azure, users can customize configurations, scale resources as needed, and integrate automation workflows into existing systems and cloud services.
This offer simplifies the initial setup process and provides a reliable foundation for building automation use cases such as data synchronization, notifications, scheduled jobs, and API orchestration. Ongoing maintenance, security updates, and workflow design are managed by the user.
- Type virtual machines in the search.
- Under Services, select Virtual machines.
- In the Virtual machines page, select Add. The Create a virtual machine page opens.
- In the Basics tab, under Project details, make sure the correct subscription is selected and then choose to Create new resource group. Type myResourceGroup for the name.*.
- Under Instance details, type myVM for the Virtual machine name, choose East US for your Region, and choose Ubuntu 18.04 LTS for your Image. Leave the other defaults.
- Under Administrator account, select SSH public key, type your user name, then paste in your public key. Remove any leading or trailing white space in your public key.
- Under Inbound port rules > Public inbound ports, choose Allow selected ports and then select SSH (22) and HTTP (80) from the drop-down.
- Leave the remaining defaults and then select the Review + create button at the bottom of the page.
- On the Create a virtual machine page, you can see the details about the VM you are about to create. When you are ready, select Create.
It will take a few minutes for your VM to be deployed. When the deployment is finished, move on to the next section.
Connect to virtual machine
Create an SSH connection with the VM.
- Select the Connect button on the overview page for your VM.
- In the Connect to virtual machine page, keep the default options to connect by IP address over port 22. In Login using VM local account a connection command is shown. Select the button to copy the command. The following example shows what the SSH connection command looks like:
ssh azureuser@<ip>
- Using the same bash shell you used to create your SSH key pair (you can reopen the Cloud Shell by selecting >_ again or going to https://shell.azure.com/bash), paste the SSH connection command into the shell to create an SSH session.
Usage/ Deployment Instructions
Connect to VM- Port- 22.
Run below commands after ssh into the machine to run n8n server.
export N8N_SECURE_COOKIE=false
n8n
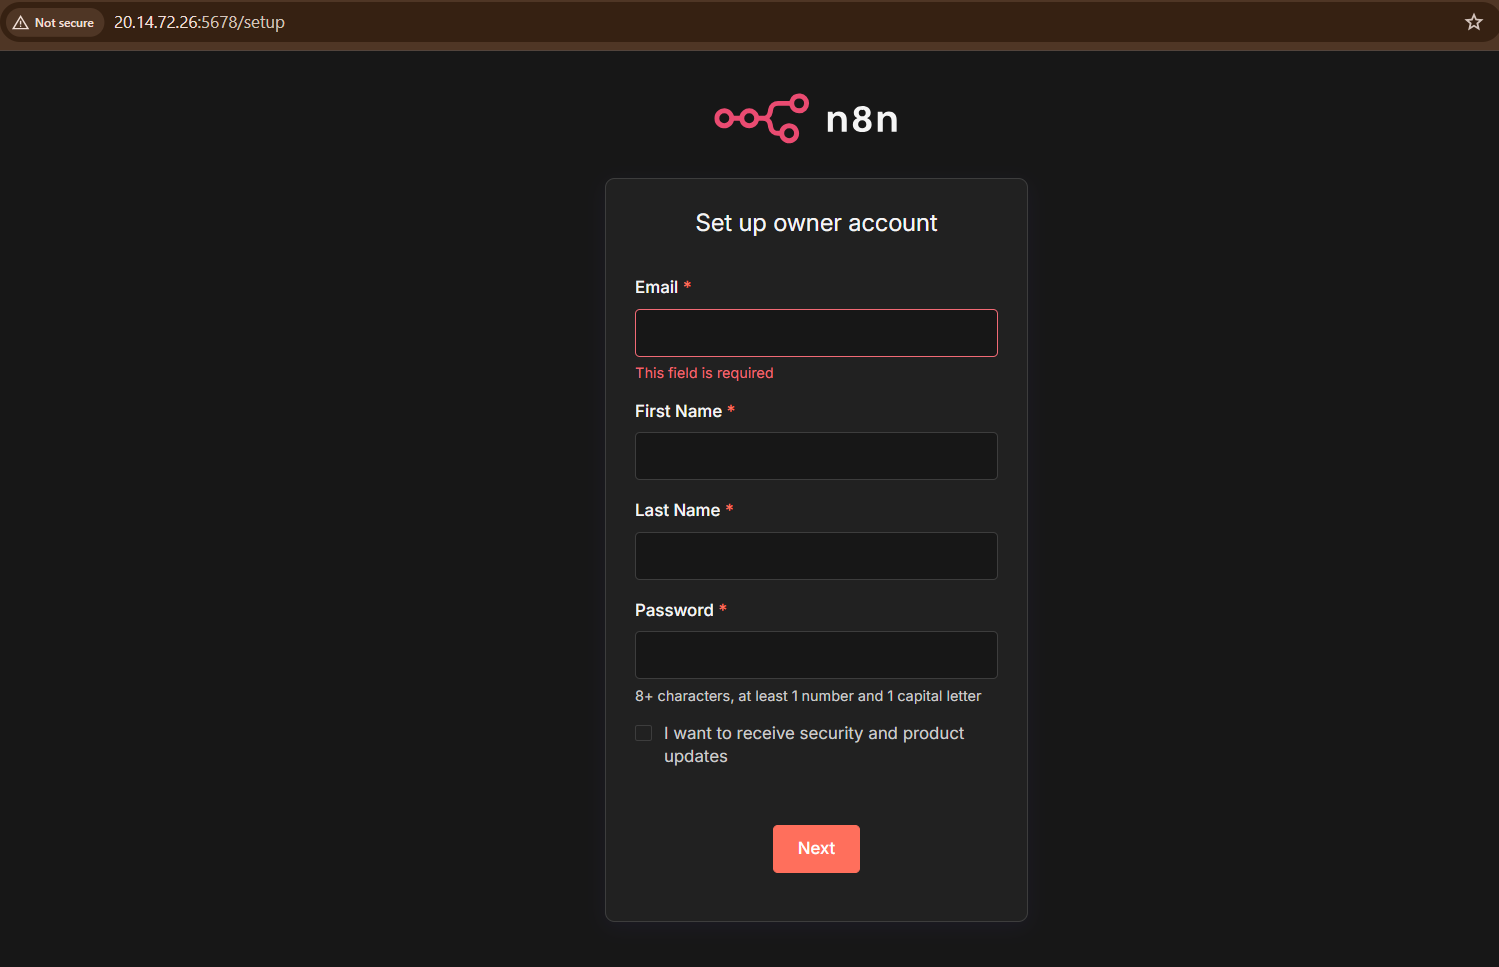
Access the n8n Dashboard
http://<Public-vm-ip>:5678
Use a Reverse Proxy to Secure n8n In a production environment, it is best practice to set up a reverse proxy with SSL/TLS.
- (510) 298-5936
Submit Your Request
Highlights
- Preconfigured deployment of n8n on Ubuntu
- Self-hosted workflow automation with full control over data
- Visual editor for building and managing automated workflows
- Integrates with APIs, cloud services, and internal systems
Application Installed
